Friday 28 April 2023

Key factors to focus in the Canvas App development

When developing a Canvas App, there are several key factors that you should focus on to ensure that the app meets your needs and the needs of your users. Here are some of the most important factors to consider:

Data protection and privacy: Ensure that the app complies with relevant data protection and privacy regulations, such as GDPR, CCPA, etc. This includes properly securing and protecting user data and obtaining consent for data collection and processing.

Accessibility: Ensure that the app is accessible to all users, including those with disabilities. This includes designing the app with accessibility in mind, such as providing alternative text for images and ensuring keyboard navigation.
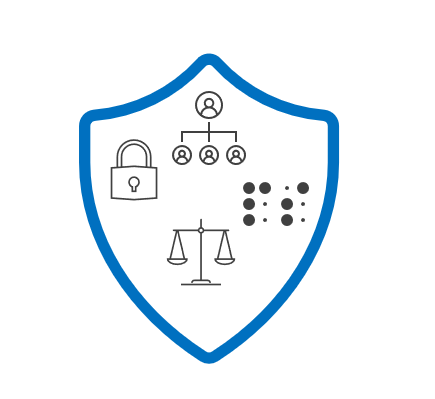
Security: Ensure that the app is secure and protected from unauthorized access. This includes implementing appropriate access controls and permissions, using secure data connections, and regularly testing for vulnerabilities.

Governance: Establish governance policies for the app, such as who has access to modify and publish the app, and how changes to the app are reviewed and approved.

Compliance: Ensure that the app complies with relevant organizational policies and procedures, such as branding guidelines, IT policies, and software development standards.

Performance: Ensure that the app performs well and is optimized for speed and efficiency. This includes regularly monitoring and tuning the app's performance.

By considering these policies, you can ensure that your canvas app in Power Platform is developed with security, compliance, accessibility, and performance in mind, providing a valuable tool for your organization while minimizing risk.

Monday 13 March 2023

Must read: Trying to convert Figma Image to canvas app in PowerApps using Image(Preview)?

 To convert a design from Figma to a Canvas app in PowerApps, you can follow these general steps:

Export the Figma design: In Figma, select the design you want to convert and then click on File > Export. Choose the format that you want to export the design in (e.g., PNG, JPG, SVG) and save the file to your computer.


Create a new Canvas app in PowerApps: Log in to PowerApps and create a new Canvas app. Choose the Image(Preview) option.

Please read the instructions carefully.


Now, we need to upload the image that we have exported from the Figma.


It quickly recognizes all the components in the image, that we have uploaded in the previous screen.


In this step, we can create the new table in Dataverse to store the values shown in the previous screen or can skip this step for now.


If you have selected the option to create a new table, then you have to provide the data type for the columns.


In this preview, we are provided with few basic data types as shown below. 


According to the requirement, we have now selected the column names and data types.

In the next step, you will have the provision to change the table name and primary field mapping. Once done, final thing is to create the table by clicking on the “Create” button.


Now you are all set to go, it starts creating the table and canvas app for you.


Here is the magic, you see the Canvas app is created for you with almost 40% of the content from your image file is now available in the app, with data source (Dataverse table) connected to it. But the content shown in the tabular view are not stored in table as records and is not shown in gallery view here.


Overall, the key to converting a Figma design to a Canvas app in PowerApps is to use the Figma design as a reference and then add the necessary controls and functionality to match the design in PowerApps. 

As Image conversion to App feature is still in Preview mode. May be we can try this approach for Form images, but not for grid views or table view images.

Saturday 11 March 2023

Dynamics 365 CE: When to use OOB Workflows vs Power Automate Flow

Both Workflows and Power Automate Flows can be used to automate business processes in Dynamics 365 CE, but they have some differences that may make one more suitable than the other depending on the specific scenario.

Here are some general guidelines to help you decide which to use:

  1. Complexity of the process: Workflows are best for simple, linear processes that require only basic logic and don't involve multiple entities. Power Automate Flows, on the other hand, can handle more complex processes that involve multiple entities, conditional branching, looping, and more.

  2. Real-time vs. batch processing: Workflows are designed to run in real-time, meaning they are triggered immediately when a specific event occurs in Dynamics 365 CE. Power Automate Flows, on the other hand, can be triggered in real-time or can be scheduled to run at specific times, making them more suitable for batch processing scenarios.

  3. Integration with external systems: Power Automate Flows have built-in connectors that allow you to easily integrate with external systems like SharePoint, Twitter, and Salesforce. Workflows do not have these connectors, so if you need to integrate with external systems, Power Automate Flows may be the better choice.

  4. User interface: Workflows are created using a point-and-click interface within Dynamics 365 CE, while Power Automate Flows are created in a separate web-based interface. If you prefer to work within Dynamics 365 CE, workflows may be the better choice.

  5. Licensing: Power Automate Flows require a separate licensing, whereas workflows are included in the Dynamics 365 CE licenses.

In summary, Workflows are best for simple processes that require real-time processing and limited external integration, while Power Automate Flows are best for more complex processes that require batch processing and/or integration with external systems.

Wednesday 8 March 2023

How to consume data from Dynamics 365 Finance and Operations in Canvas App?

 To consume data from Dynamics 365 Finance and Operations in a Canvas app, you can follow these steps:

  1. Create a new connection to Dynamics 365 Finance and Operations in Power Apps. To do this, click on the "Connections" tab and then click on "New Connection." Search for "Dynamics 365 Finance and Operations" and select it.

  2. Authenticate your connection by entering your Dynamics 365 Finance and Operations credentials.

  3. Once your connection is created, you can start building your Canvas app. To add data from Dynamics 365 Finance and Operations, add a new data source by clicking on "Data sources" and then clicking on "Add data source."

  4. Select the Dynamics 365 Finance and Operations connection you just created.

  5. Choose the entity or table that you want to use as a data source. You can do this by selecting the entity from the dropdown list or by searching for it.

  6. Once you have selected your entity, you can add fields to your app by dragging and dropping them onto the canvas.

  7. You can now use the data from Dynamics 365 Finance and Operations in your app. For example, you could use it to display a list of customers, create invoices, or update product information.

  8. To display the data from Dynamics 365 Finance and Operations in a particular format, you can use various controls and functions available in Power Apps, such as galleries, forms, and filters.

  9. Finally, test your app to ensure that the data from Dynamics 365 Finance and Operations is being displayed correctly.

Sunday 5 March 2023

Move existing email attachments from Dynamics 365 to Azure Blob storage using Power Automate Flow

To move existing email attachments from Dynamics 365 to Azure Blob storage without writing any code, you can follow these steps:

  1. Set up Azure Blob storage: If you haven't already, create an Azure Blob storage account in the Azure portal. Make a note of the storage account name, container name, and access key.

  2. Set up Power Automate: Power Automate (formerly Microsoft Flow) is a cloud-based service that allows you to create automated workflows between different applications and services, including Dynamics 365 and Azure Blob storage. Go to the Power Automate website and sign in with your Microsoft account. If you're new to Power Automate, you may need to create a new account.

  3. Create a new Power Automate workflow: Click on the "Create" button on the Power Automate home page, then select "Instant cloud flow". Give your flow a name and click "Create".

  4. Configure the trigger: In the workflow designer, click on "Manually trigger a flow" under "Start with". This will allow you to manually trigger the flow when you're ready to move email attachments to Azure Blob storage.

  5. Get the email attachments: Add the "Get attachments (preview)" action to the workflow. In the "Email Message Id" field, select the ID of the email message containing the attachments. You can get this ID by opening the email in Dynamics 365 and looking for the "Message Id" field.

  6. Add the Azure Blob storage action: Add the "Create blob" action to the workflow. In the "Blob content" field, select the output from the "Get attachments (preview)" action. In the "Blob name" field, specify a name for the blob. You can use dynamic content to create a unique name for each blob, such as the name of the email attachment.

  7. Configure the Azure Blob storage connection: If you haven't already, you'll need to create a connection to your Azure Blob storage account. Click on "New Connection" under "Connections" and select "Azure Blob Storage". Enter your storage account name, container name, and access key.

  8. Test the workflow: Save and test the workflow to make sure it's working correctly. To trigger the workflow, click on "Run flow" and follow the prompts.

  9. Schedule the workflow (optional): If you want to automate the process of moving email attachments to Azure Blob storage on a regular basis, you can schedule the workflow to run automatically. Click on "Scheduled from blank" under "Start with" and follow the prompts to set up a schedule.

That's it! Your existing email attachments from Dynamics 365 will now be moved to Azure Blob storage automatically.

How to fetch data from Dynamics 365 CRM online from Power Virtual Agent?


To fetch data from Dynamics 365 CRM online in Power Virtual Agent, you can follow these steps:

1. Connect your Power Virtual Agent to your Dynamics 365 CRM online instance using the Dynamics 365 connector. To do this, navigate to the "Connections" tab in the left-hand menu of the Power Virtual Agent authoring canvas, and click the "New connection" button. Select the "Dynamics 365" connector, and follow the prompts to enter your CRM instance URL and credentials.


2. Once you've established a connection, you can use the "Get records" action in Power Virtual Agent to retrieve data from your CRM instance. To use this action, drag it from the "Data" category of the "Actions" panel onto the canvas, and configure the action to specify the entity you want to retrieve records from, as well as any filters or sorting options you need.


3. Once you've retrieved the data, you can use the "Send a message" action to display the data in your bot's conversation flow. To do this, drag the "Send a message" action onto the canvas, and configure the action to include the data you retrieved in the previous step. You can use variables and expressions to format the data as needed.


4. Finally, you can test your bot to ensure that it is properly retrieving and displaying data from your CRM instance. You can do this by clicking the "Test bot" button in the upper right-hand corner of the authoring canvas, and then engaging your bot in a conversation in the test window that appears.

Dynamics 365 Customer Experience Focus Areas: Technical Consultant (Beginner Level)

 As a beginner in Dynamics 365 CE, there are several areas that a technical consultant should know. Here are some of the essential areas that you should focus on:

  1. Data Model: Understanding the data model of Dynamics 365 CE is critical. You should know the different types of entities, their relationships, and how to create custom entities.

  2. Configuration: Dynamics 365 CE offers extensive configuration capabilities that allow you to tailor the application to your customer's needs. You should be familiar with the configuration options, including customizing forms, views, dashboards, and business process flows.

  3. Development: Dynamics 365 CE provides a robust development platform that allows you to build custom extensions using various technologies like C#, JavaScript, HTML, and CSS. You should be familiar with the development tools and techniques used in Dynamics 365 CE.

  4. Integration: Dynamics 365 CE supports integration with other systems using various integration technologies like REST API, SOAP, and OData. You should know how to integrate Dynamics 365 CE with other systems.

  5. Security: Dynamics 365 CE has a sophisticated security model that allows you to control access to data and functionality. You should be familiar with the security model and know how to configure security roles and privileges.

  6. Business Processes: Dynamics 365 CE supports various business processes, such as lead management, opportunity management, and case management. You should understand how these processes work and how to configure them to meet your customer's requirements.

  7. Power Platform: Dynamics 365 CE is part of the Microsoft Power Platform, which includes Power Apps, Power Automate, and Power BI. You should be familiar with the Power Platform and know how to leverage its capabilities to build custom solutions.

By mastering these areas, you can become an effective Dynamics 365 CE technical consultant and deliver solutions that meet your customer's needs.

Scenarios to use Virtual Table in Dataverse (Power Platform)

Virtual tables in Dataverse provide a way to access extern al data sources without requiring data replication or synchronization. Here are...